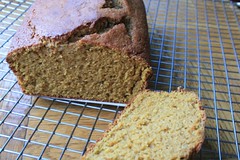
There has been a lot of squash in our lives... maybe too much. From eating plain baked squash, squash seeds toasted in garlic and butter, and Butternut Acorn squash soup, what else could there be left to do with this roasted squash? Well, there was the idea of squash souffle, creme brulee, and cookies, but alas, I settled on just some bread. This is my first loaf that actually came out well with a great consistency and texture. Yay! I am finally learning how to successfully bake at Altitude.
Butternut and Acorn Squash Bread
ingredients
1.33 c butternut & acorn squash puree
2 eggs
.5 c canola oil
.25 c water
1 c white sugar
.5 c light brown sugar
1.75 c AP flour
.5 c corn meal
.5 tsp b soda
.5 tsp b powder
.5 tsp sea salt
1.5 tsp cinnamon
.5 tsp ground nutmeg
.5 tsp ground ginger
instructions
1. preheat oven to 365F, prepare loaf pan with parchment paper
2. mix together puree, eggs, sugars, oil and water
3. in another bowl, mix together the dry ingredients
4. in 3rds, add the dry mix to the wet mixture, mixing until all is incorporated
5. pour mix into prepared pan, bake for 40-55 minutes, or until cake tester comes out clean
6. enjoy with a pat of butter
makes 1 loaf
Saturday, November 6, 2010
Friday, November 5, 2010
Baked Chicken, 4 ways- Part 4, Chicken Pot Pie
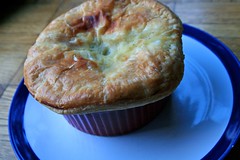
Ah, so here is my last installment of "Baked Chicken, 4 ways". Chicken Pot Pie! This wasn't my best looking pie nor is this really one of my better photos, but its okay... the end result of this dish is deeelliiccciiouuussss!! Creamy, chickeny with a top of puff pastry... it is buttery, fatty, goodness.
My photo doesn't show the great puff factor of the puff pastry, mainly because I made a mistake of putting some in a baking dish, and some on a cookie sheet, which made alllll the difference in the puff factor. The ones on the cookie sheet puffed amazingly, where as the ones in the baking dish did not... so word of advice, put it on a cookie sheet!
I bought puff pastry. To make puff pastry, you need days upon days and a lot of patience. Unfortunately, most puff pastry that you find in conventional groceries have hydrogenated oil (ie tran fats), which makes them cheap but I am not a trans fat eating kind of girl, plus puff pastry should be made with nothing but flour, butter, salt and some ice cold water. So I went to Whole Foods and splurged on a 14 oz package of puff pastry ($10) which was the most expensive component, but totally worth it!
Everything else in the filling is pretty standard, shredded chicken, peas, carrots, onion, celery, chicken broth and whole milk. Finally, the end is near for all of that shredded chicken!
Chicken Pot Pie
ingredients
2.5 tblspn butter
1.5 c shredded chicken
1 medium onion, chopped
2 carrots, chopped
3 stalks celery, sliced
3 cloves garlic, chopped
1/2 cup flour
2.5-3 cup chicken stock
1 cup whole milk
1 cup peas
1 tblspn parsley
s&p to taste
1 package of puff pastry, thawed in advance
1 egg, beaten with 1 tsp water
6 6oz ramekins
instructions
1. Preheat oven to 375F, take your puff pastry out of the fridge and cut out the shape of your ramekin so that the puff pastry is slightly larger then your ramekin, put back into the fridge while you make your filling
2. in a large sauce pan, with medium high heat, melt butter and add onions, celery, carrots and garlic, and a little bit of salt and pepper
3. sautee the mix until onions are translucent, about 10-15 minutes
4. sprinkle flour on, evenly coating the mixture. this will help prevent lumping
5. add 2.5 cups of chicken stock to start and bring to a simmer
6. add milk
7. add chicken, peas and parsley,
8. if the mixture seems too thick, thin out with additional chicken broth.
9. Season with additional salt and pepper as desired
10. ladle in hot filling, until ramekins about 2/3 full
11. put on puff pastry top, pinching the edges to the bowl. cut or punch a hole in the top to allow the pot pie to vent
12. brush on egg wash
13. while you are filling up the other ramekins, put the prepared ones in the fridge
14. once all the ramekins have been prepared, place in oven, on a cookie sheet for 15-25 minutes, until tops have puffed and are golden brown
yum yum yum!
Thursday, November 4, 2010
Baked Chicken, 4 Ways- Parts 2 & 3
So what else can you do with 6 lbs of chicken? Well, hopefully when you ate it (and not all of the chicken), you saved the bones. I should have mentioned, the 6 lbs of chicken meat was meant for only 2 people, and made to stretch of dinner that night, chicken chunks for butternut squash soup and more chicken for Part 4!
Parts 2 and 3 will consist of making chicken stock and then using the baked squash to make a Curried Butternut & Acorn Squash Soup!! For making the stock, in case you are not blessed with owning a fine meshed sieve, a clean dishtowel in a colander will work well for straining your chicken broth out (a great little trick that Chris Lloyd and I learned last year when hosting Thanksgiving!).
Other exciting news in my life consists of is the Cuisinart Smart Stick. Thanks Crow for the Crate&Barrel gift card :] !! My old Toastmaster worked wonders for a while, but finally got just a bit too tired and broken, so I traded up and got this little guy. Although there is only one speed setting, it is a wonderful kitchen tool, not to mention all the other great little add ons that come with the set! It quickly and evenly purred the soup into nice and smooth squash soup goodness!!
Chicken Stock & Curried Butternut & Acorn Squash Soup
For the Stock
ingredients
1 leek, white parts only
2 celery stalks, cut into 3 inch lengths
2 carrots, cut into 3 inch lengths
1/2 large onion
1 bay leaf
1/4 tsp peppercorns
chicken bones
1-3 pieces of raw chicken pieces (drumsticks, thighs, or wings)
For the Soup
ingredients
1/2 onion, chopped
1 celery stalk, chopped
1 carrot, chopped
2 chopped garlic cloves
2 tablespoons olive oil
3 cups of baked butternut & acorn squash
1 tart apple, peeled and cubed
1.5 cups shredded chicken meat (left over from baked chicken)
3-4 cups of chicken stock*
1-2 tablespoons curry powder
salt & pepper
instructions
For the Stock
1. remove the meat off of your uneaten, remaining chicken legs and set aside. place everything else (bones from legs, skin peeled off, etc etc) into a 5-6 quart stock pot
2. fill pot with cold water until all ingredients are covered plus 2 inches
3. put pot on stove, on high, uncovered. as soon as bubbles start to break the surface, turn the heat down so that the pot barely simmers
4. LEAVE UNCOVERED. Skim away surface crud as needed
5. leave on a barely simmer for 3-6 hours, or until all flavor has been leeched out
6. remove all large pieces. Having a clean 3 quart pot ready, strain broth with a fine mesh sieve to get the rest of the crud out
7. plunge pot into a 40F ice bath to cool
8. set aside needed chicken broth volume, and the remainder into the fridge!
instructions
For the Soup
1. in a 3 quart pot, heat olive oil.
2. toss in onions, garlic, celery, and carrots. lightly salt. Cook until onions are translucent, ~ 10 minutes
4. Mix in butternut squash & apple
5. Add about 2.5 - 3 cups of chicken stock, enough to mix into the squash and cover it
6. bring to a near boil, and then let simmer for 20 minutes, or until apples are soft
7. take off heat, and with immersion wand, blend mixture until it is of smooth consistency
8. if it is too thick, add more chicken broth
9. add chicken, and heat up to a low simmer.
10. add curry powder, salt and pepper until desired flavor is reached
* If you have an entire day to make chicken stock followed by the soup, then use your homemade chicken stock, just know since the intial stock is made without salt, you'll have to add more salt. If you are impatient, like me, you can use regular from the can chicken stock
Tuesday, November 2, 2010
Baked Chicken, 4 ways- Part 1
Hello World! I've been lacking on my blogging... wow! So much has happened since September 17th.. okay, not really...
Happy belated birthday to my friend Christel. I promised I would do a special blog for her birthday (she did grilled pizzas- they were amazing!!) but the time has waaayyy past!
Anyhow, nothing too new in my life, yes, still very much unemployed!! The mountains are getting glorious amounts of snow (it's a sight to be seen!) and I am seriously contemplating heading to A Basin for some early season snowboarding tomorrow. My life is hard. I know.
This next series of blogs are going to be about chicken quarters. The chicken quarter, for me personally, is the best part of the chicken, with dark meat, some white and tons of flavor... not to mention it is also super duper inexpensive (Hi Chicken Breasts! What? you cost $7.99/lb? No thanks, I'll take some of them Chicken Legs instead for $1.99). Since it is fall and winter squashes are becoming a plenty, I am taking this opportunity to see what I can do with chicken and winter squashes.
So in this edition of my blog, you can pick and choose what you want to make... but let us follow the life of 6 lbs of chicken legs that I bought. This blog also won't have a picture (we ate part 1 of the chicken legs last night) but everything else will. First up is just baked chicken legs. In the oven with the legs are oven baked potato wedges and acorn and butternut squash. Sure, it sounds like a lot to have in your oven, but you might as well be green if you are turning it on by cooking as much as possible right? The legs and potatoes will obviously be eaten tonight and you can obviously have a side of squash too, but the squash will be mainly used for the next evening's dish.
Evening 1, Baked Chicken Quarters, Potato Wedges, and a side of Squash
ingredients
6 lbs of chicken legs, rinsed and pat dry
5 yukon gold potatoes, cut into wedges
Sea salt
pepper
olive oil
1 medium yellow onion, cut into wedges
garlic, coarsely chopped
1/8 tsp red chili flakes
1 butternut squash
2 acorn squash
1 tblspn of flour
1/4 c chicken broth
instructions
1. preheat oven to 375F, coat bottom of baking pan with olive oil
2. season chicken with salt&pepper
3. rub chicken with olive oil
4. place chicken onto baking pan, wedge about 1/2 of the onion in between chicken
5. in a bowl, toss the potatoes in salt&pepper, garlic, and chili flakes.
6. chop up remaining onion and toss that with the potatoes too
7. place in a baking pan
8. cut acorn and butternut squashes in half, remove strings and seeds (save the seeds, they are excellent toasted)
9. in another baking pan, place squash halves cut face up, sprinkle with sea salt, add water so that it is about .5 inches deep and cover with foil
10. place all three pans (chicken, potatoes and squash) into the oven. Bake for 45 - 60 min until juices of the chicken run clear and the squash can have a knife move through it easily, potatoes can be periodically tossed (every 15 min)
11. At this point, if the chicken hasn't thoroughly browned, turn the broiler on to brown the chicken and the potatoes. Remove squash and let cool.
12. Remove chicken from pan and let rest. Toss potatoes to let it continue to brown
13. Transfer the drippings from the pan to a sauce pan. Add small amounts of flour at a time, while whisking continually. Add a bit of chicken broth, continuing to whisk. Add a bit more flour until your gravy has reached desired consistency.
14. Consume dinner of baked chicken, potatoes, and if you want, some of the squash (I scooped a bit out and added some butter)
15. Once the squash has cooled, scoop out its innards and toss the shell. Let everything throughly cool before you store in the fridge.
Tomorrow, we will be making chicken stock, butternut and acorn squash soup!
Friday, September 17, 2010
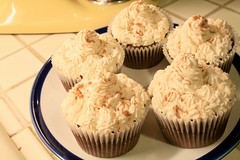
Spicy Ibarra Chocolate Cupcake with Cinnamon Whipped Cream Frosting
I took a small adventure to Aurora, CO. Who knew Aurora housed a beautiful biotech hub and the University of Colorado Medical Center and little Mexico? As I drove around looking for where I needed to go (the Med Center), I drove past a Mexican Grocery store. JACK POT!!! I've been on the hunt for Mexican Chocolate, specifically Ibarra. Mexican chocolate is not like your average Scharffenberger Chocolate bar which you take out of the foil wrap and consume. Instead Mexican chocolate is composed of extremely granular sugar, cacao nibs and cinnamon. Typically it is melted down in milk and made into hot chocolate. Tasty! Looks like Dan and I will be enjoying some extra spice and sugar in our hot chocolates this winter!
Besides Ibarra, what ELSE could make a typical Chocolate Cupcake amazing? Have you ever had a Spicy Chocolate Bar? Oh, who knew the flavor of chili spiciness could be so mutually symbiotic to chocolate... like champagne and oysters, it was meant to be! This flavorful cupcake has a lingering heat from red chili powder, a subtle hint of cinnamon and the crunch of Ibarra.
Ohhh la la!!!
Spicy Ibarra Chocolate Cupcake with Cinnamon Whipped Cream Frosting
ingredients
1 c AP flour
6 tblspn cocoa powder
.33 (.5@SL) tsp b soda
.33 (.5@SL) tsp b powder
.25 tsp salt
.25 tsp red chili powder
.25 tsp cinnamon
1 stick unsalted butter, softened
1 cup (minus 2 tblspn) white sugar
1.5 tsp vanilla
1 egg
.5 c milk*
.33 c heavy cream*
*if @SL, 2/3 cup whole milk would be just fine
4 squares of Ibarra, chopped
instructions
cupcake
1. Preheat your oven to 375 (350@SL), prepare cupcake tin.
2. whipped butter and sugar together until creamed and fluffy
3. add egg until mixed, add vanilla
4. in a separate bowl, mix flour, baking powder, baking soda, salt, chili powder and cinnamon
5. alternating between dry, wet, dry, wet, ending in dry combine flour mixture and milk
6. fold in Ibarra chocolate
7. pour into pan (2/3rd full for standard, 1/2 full for giant sized)
8. bake 20 or so minutes until toothpick comes out clean.
9. let cool on wire rack
makes 6 giant cupcakes
Cinnamon Whipped Cream
ingredients
.5 c heavy whipping cream
3 tblspn powder sugar
.5 tsp vanilla extract
.25 tsp cinnamon
instructions
1. first mix sugar, vanilla & cinnamon
2. slowly add in cream until soft peaks form
3. do not over beat or else you will get butter
4. Top on cooled cupcakes and sprinkle addition cinnamon on top if desired.
Wednesday, September 8, 2010
Salmon with Roasted Red Pepper Sauce
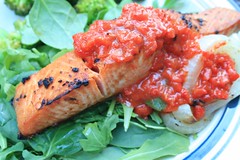
Happy Post Labor Day Weekend! I just wrote and entire blog about how my meal I just ate (see photo) was the least environmentally plate ever. Greens from California, Fish flown from Alaska, Bell Pepper from Canada... oh but the onion, that's from Colorado...
Anyhow, I've been making all sorts of sandwiches and recently, its rekindled my love for the roasted bell pepper. sweet, tangy, and oh so delicious it is such a versitile addition to anything! I had one left over in the fridge from making sandwiches... but hm, an entire roasted pepper on a piece of fish? hmm... how about I food processor that up and dump it over some broiled salmon. Voila!
I chose to eat this on a bed of baby arugula and baby spinach sans dressing with a side of steamed broccoli. You can easily choose to eat it with rice, potatoes or whatever else side you want!
Salmon with Roasted Red Pepper Sauce
ingredients
2 6 oz portions of Salmon (I bought King)
4 slices of sweet onion
1 roasted bell pepper
1 tsp olive oil + some
1 garlic clove, minced
s&p to taste
instructions
1. prepare salmon and onion by rubbing with olive oil, sprinkle with s&p; place on broiling pan
2. rub minced garlic on salmon
3. turn on broiler to low and allow 5 minutes for the broiler to heat up, then broil the fish and onion 5 inches away from heat for 5 minutes
4. while the fish is broiling, coarsely chop the bell pepper and place in a mini food processor. Pulse 4-5 times. add the olive oil and pule 3-4 more times. sprinkle in some salt to taste
5. flip the onion over, turn the broiler on HIGH for 3-4 minutes to brown up the fish and onion
6. Plate your fish, top with roasted red pepper sauce
makes enough sauce for 2 portions
Friday, August 27, 2010
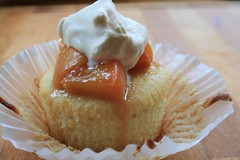
Vanilla Cupcake with Palisade Peaches and Whipped Cream
I've recently begun to bake in Boulder. I thought I'd start with cookies but 5 batches deep now… I still haven't quite gotten it right… I found this great article on NPR about a women who did a DIY wedding cake for her brothers wedding and made a Alice Water's 1-2-3-4 Cake. Essentially, that's what my vanilla cupcake recipe entails, with a few high altitude modifications (slightly less flour, slightly more liquid, slightly higher temperature) and a little bit of Lisa touch. I also opted not to make frosting and instead made a peach compote type thing with a dollop of whipped cream to top it off. The cake itself is moist, dense and very rick in flavor.
These peaches are special. They are called "Palisade Peaches", and come from the south western corner Colorado. I always thought the best peaches came from California (best peach experience was when Craig Edelman brought me and entire case of white peaches fresh from the farmers market for my birthday) but no, in actuality, CO makes a darn good peach. They are extraordinarily fuzzy compared to any other peach I have ever seen and oh so very juicy, soft and nearly instantly ripe.
In the cake, instead of regular whole milk, I used buttermilk, which gives it such a nice creamy, tangy burst of flavor, a little trick I learned from my friend Jen in grad school. I'll do my best to keep it so that you can make this at sea level too, but here is the original recipe and the NPR article. You'll see I'll add a different value, # @SL, meaning use this amount if you are at sea level!
If you are super lazy, (although I don't really recommend it), canned whipped cream or cool whip would be sufficient as a quick topper.
Oh, and how am I doing you might ask? Ahh, just fine. And yes, I am still unemployed but am one happy camper!!
Vanilla Cupcake with Peach Compote and Whipped Cream
ingredients
cupcake
.75 tsp/2 tsp@SL baking powder
.25 tsp sea salt
1.33 c/1.5 c @SL AP flour , sift then measure
1 stick unsalted butter, softened
1 c granulated white sugar
2 eggs, separated
1 tsp vanilla extract
.5 c buttermilk
peach compote
2 tblspn unsalted butter
3 medium, ripe peaches, diced into .25 inch pieces
pinch of salt
2 tblspn brown sugar
whipped cream
.5 c heavy whipping cream
3 tblspn pwoder sugar
.5 tsp vanilla extract
instructions
cupcake
1. Preheat your oven to 375 (350@SL), prepare cupcake tin.
2. whipped butter and sugar together until creamed and fluffy
3. add one yolk at a time until mixed, add vanilla
4. in a separate bowl, mix flour, baking powder and salt
5. alternating between dry, wet, dry, wet, ending in dry combine flour mixture and buttermilk
6. in a metal or copper bowl, whisk egg whites until soft peaks form
7. fold in egg white mixture (by hand) in thirds until all egg whites have been incorporated
8. pour into pan (2/3rd full for standard, 1/2 full for giant sized)
9. bake 20 or so minutes until toothpick comes out clean.
makes 8 giant cupcakes, or 12 standard cupcakes
peach compote
1. melt butter on medium high heat. DO NOT CAUSE THE BUTTER TO BROWN
2. sauté peaches, add salt
3. add brown sugar and cook until peaches are soft and liquid around peaches is bubbly
4. you can also add a splash of amaretto or grand marnier at this point or a sprinkle of cinnamon.
whipped cream
1. first mix sugar and vanilla
2. slowly add in cream until soft peaks form
3. do not over beat or else you will get butter
THE WHOLE CUPCAKE
once the cupcake has been cooled on a wire rack and the compote has been cooled to RT, put the compote on the cupcake and then add a dollop of whipped cream. Voila!
Thursday, August 5, 2010
Bailey's Dark Chocolate Gelato
about 8 years ago I developed this amazing love affair with ice cream that spawned into more then I could ever ask for. When I was 17 years old, I got the best job a girl could ask for: scooping ice cream with a bunch of 17 year olds... best part? IN A CASINO. haha! I worked for Ben and Jerry's until my sophomore year of college. Because of that job, I've made some ever lasting friendships and have some of the fondest memories with the people I worked with and hung out with. Much love for my Ben and Jerry's crew!
As many of you know, I have been DYING for an ice cream maker attachement for my Kitchen Aid. With the attachment costing $80, I haven't quite made the dive yet. Alternatively, here is my first non ice cream maker making ice cream experience. I found this on David Lebovitz's Blog. I'll call it more of a gelato, because it doesn't quite have the same consistency for ice cream. I made a few modifications, but click on the link for the original concoction. What a tasty treat! It is SO EXTREMELY EASY TO MAKE!! foolish if you can't. And if you like alcohol, why bother with an aperitif if you can have it in your ice cream :) The alcohol used in this recipe is essentially what is preventing the dairy from freezing and the banana gives it a creamy texture.
It's a tasty treat all right!
Bailey's Dark Chocoalte Gelato
ingredients
.25 c semi sweet dark chocolate chips (I used 60% ghirardelli chips)
1 very ripe banana, mashed
5 tblspn heavy cream
1 tblspn water
6 tblspn Bailey's
1 tblspn dark rum
instructions
1. take the mashed banana and mix well with heavy cream, water, Bailey's, and rum. mix until it is no longer chunky. you might want an emulsifying wand to help the process
2. take the chips and melt in the microwave or over double boiler
3. add banana/booze mixture and stir into melted chips (off heat if you used the double boiler). Whisk well, until it is a chocolate sauce.
4. If needed, send the mixture through a sieve or find strainer to eliminate chunks of banana.
5. place in a small metal or plastic container. cover with plastic wrap such that it makes contact with the surface
6. freeze for at least 2-3 hrs.
7. consume!!!
makes a tasty 4-5 medium sized scoops!
Wednesday, August 4, 2010
Pan Seared Mahi Mahi
Oh my goodness I don't even remember the last time I posted was… pre birthday maybe? ::checks blog::, yup June 1st. Okay, so 2 months later, what has happened?
1. I turned 25!
2. I graduated from Rush!
3. I moved out of Chicago
4. I drove across the mid atlantic with my parents back to CT. The most exciting part was probably somewhere in the middle of Ohio, where my car locked itself, with the keys in the ignition. WHAT?? you might say? Well, for some of you that have driven in my Corolla, I have been swearing on my life that my car is possessed and it goes nuts and goes locking wonky. Well, the one time I ever leave the keys in the ignition, the doors locked (windows closed) as my mother and I stood outside stretching it out. Thankfully 45 minutes later and some help from AAA, we are back on the road and make it safe to CT.
5. I had a great time in CT, love my shandrea
6. I met Dan's Mom!
7. Watched THE MOST EPIC FIREWORKS SHOW IN BOSTON EVER. AMAZING!!!
8. Dan met my mom and dad (again)
9. Dan and I began our trip out to CO, with a detour in Hoboken NJ (note to self, never take the GW Bridge, regardless of what time it is) and the Eastern Shore of VA.
10. We blazed across country from VA --> Indy --> Boulder in just 2 days. Missouri was the best because at Chick fil a, they looked like they never saw an asian in their entire life! ha!
11. I moved to Boulder, CO.
So what am I doing now you might ask me? Well, really I've been catching up on a lot of sleep. a lot. I'd say MONTHS worth. I've also been quite busy with the "job hunting" business, which, well is slow going, but going. Lots of hiking and biking and movie watching and really just enjoying everything there is to love about summer. I tried baking cookies once. They turned out mediocre at best. This high altitude baking, ::sigh:: well… I guess I have to start over! Other tasty things I have made have included no bake cheese cake, grilled stuffed zucchini, citrus brown sugar glazed salmon, stuffed chicken thighs, and things of the like.... sorry I haven't blogged them!
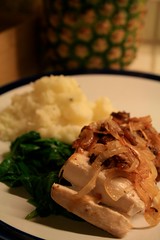
And today, what will we be focusing on? Ahh, the irony is that I am landlocked and I will be blogging about fish! Mahi mahi is not too steaky of a fish, not too flakey, just a nice in between. You might frequently see it in fish tacos too. Sear it in bacon fat and topped with caramelized onions? Suuureeee. If you are like me and don't frequently cook bacon, I suggest just going to a local butcher or Whole Foods, where they sell bacon in the deli/meat case and buy 2 or 3 slices. you want the nice thick kind. I used the applewood smoked. The scent of applewood smoked in the pan is enough just to eat bacon for dinner, let alone topping it on some pan seared fish that was seared in the bacons drippings. Don't worry about over cooking the bacon. I always loved the texture the crispy adds to the fish. Some bits might even be burnt looking by the end of the cooking process but sooooo good.
Other things: I've been trying to perfect the art of literally cooking for 2. Its hard, but I have been able to do it… sort of. This last dinner cooking round, was perfect. Nothing left over and perfectly satiated. I'm only going to blog about the protein part. Wilting spinach in garlic butter seems pretty self explanatory, and mashed potatoes, well they aren't really anything special. Minced fresh rosemary, fresh minced garlic, butter, and heavy whipping cream all whipped together with some boiled Idaho Potatoes and salt in a kitchen aid mixer.
TIP: you'll have to cube up the bacon into bits. since it is a fatty piece of meat, throw it in the freezer for 15 minutes before you start cooking. The cold will firm up the fat and make it much easier to chop up
One more thing.... from now on, my cooking times might be longer, baking times might be higher.... due the fact that I am at a little bit of a high elevation, so for times and temperature, please use your common sense... if it looks done, and is starting to burn, mayyyybeee it just might be done!
Pan Seared Mahi Mahi topped with Carmelized Onion & Bacon Crisps
ingredients
.75 lbs mahi mahi, portioned
2 strips of applewood smoked bacon (thick),
.5 sweet onion, thinly sliced
s&p to taste
instructions
1. take your bacon and cut it in half length wise, then cut the other way to cube it up
2. heat up pan to medium high heat
3. toss in bacon and cook until greeeassyyy (ie fat is rendered and meaty bits begin to crisp up)
4. toss in onion, sauté until onions become slightly browned, season mahi mahi with S&P
5. put in mahi mahi on top of the onion and bacon to sear, 5-7 min
6. flip and sear other side, 5-7 min
7. it will be cooked once it starts to be flaky or reach internal temperature (at the thickest part) of 145F.
8. serve topped with caramelized onion and bacon
nom nom!
.75 lbs of fish is enough for 2 portions. + sides
1. I turned 25!
2. I graduated from Rush!
3. I moved out of Chicago
4. I drove across the mid atlantic with my parents back to CT. The most exciting part was probably somewhere in the middle of Ohio, where my car locked itself, with the keys in the ignition. WHAT?? you might say? Well, for some of you that have driven in my Corolla, I have been swearing on my life that my car is possessed and it goes nuts and goes locking wonky. Well, the one time I ever leave the keys in the ignition, the doors locked (windows closed) as my mother and I stood outside stretching it out. Thankfully 45 minutes later and some help from AAA, we are back on the road and make it safe to CT.
5. I had a great time in CT, love my shandrea
6. I met Dan's Mom!
7. Watched THE MOST EPIC FIREWORKS SHOW IN BOSTON EVER. AMAZING!!!
8. Dan met my mom and dad (again)
9. Dan and I began our trip out to CO, with a detour in Hoboken NJ (note to self, never take the GW Bridge, regardless of what time it is) and the Eastern Shore of VA.
10. We blazed across country from VA --> Indy --> Boulder in just 2 days. Missouri was the best because at Chick fil a, they looked like they never saw an asian in their entire life! ha!
11. I moved to Boulder, CO.
So what am I doing now you might ask me? Well, really I've been catching up on a lot of sleep. a lot. I'd say MONTHS worth. I've also been quite busy with the "job hunting" business, which, well is slow going, but going. Lots of hiking and biking and movie watching and really just enjoying everything there is to love about summer. I tried baking cookies once. They turned out mediocre at best. This high altitude baking, ::sigh:: well… I guess I have to start over! Other tasty things I have made have included no bake cheese cake, grilled stuffed zucchini, citrus brown sugar glazed salmon, stuffed chicken thighs, and things of the like.... sorry I haven't blogged them!
And today, what will we be focusing on? Ahh, the irony is that I am landlocked and I will be blogging about fish! Mahi mahi is not too steaky of a fish, not too flakey, just a nice in between. You might frequently see it in fish tacos too. Sear it in bacon fat and topped with caramelized onions? Suuureeee. If you are like me and don't frequently cook bacon, I suggest just going to a local butcher or Whole Foods, where they sell bacon in the deli/meat case and buy 2 or 3 slices. you want the nice thick kind. I used the applewood smoked. The scent of applewood smoked in the pan is enough just to eat bacon for dinner, let alone topping it on some pan seared fish that was seared in the bacons drippings. Don't worry about over cooking the bacon. I always loved the texture the crispy adds to the fish. Some bits might even be burnt looking by the end of the cooking process but sooooo good.
Other things: I've been trying to perfect the art of literally cooking for 2. Its hard, but I have been able to do it… sort of. This last dinner cooking round, was perfect. Nothing left over and perfectly satiated. I'm only going to blog about the protein part. Wilting spinach in garlic butter seems pretty self explanatory, and mashed potatoes, well they aren't really anything special. Minced fresh rosemary, fresh minced garlic, butter, and heavy whipping cream all whipped together with some boiled Idaho Potatoes and salt in a kitchen aid mixer.
TIP: you'll have to cube up the bacon into bits. since it is a fatty piece of meat, throw it in the freezer for 15 minutes before you start cooking. The cold will firm up the fat and make it much easier to chop up
One more thing.... from now on, my cooking times might be longer, baking times might be higher.... due the fact that I am at a little bit of a high elevation, so for times and temperature, please use your common sense... if it looks done, and is starting to burn, mayyyybeee it just might be done!
Pan Seared Mahi Mahi topped with Carmelized Onion & Bacon Crisps
ingredients
.75 lbs mahi mahi, portioned
2 strips of applewood smoked bacon (thick),
.5 sweet onion, thinly sliced
s&p to taste
instructions
1. take your bacon and cut it in half length wise, then cut the other way to cube it up
2. heat up pan to medium high heat
3. toss in bacon and cook until greeeassyyy (ie fat is rendered and meaty bits begin to crisp up)
4. toss in onion, sauté until onions become slightly browned, season mahi mahi with S&P
5. put in mahi mahi on top of the onion and bacon to sear, 5-7 min
6. flip and sear other side, 5-7 min
7. it will be cooked once it starts to be flaky or reach internal temperature (at the thickest part) of 145F.
8. serve topped with caramelized onion and bacon
nom nom!
.75 lbs of fish is enough for 2 portions. + sides
Tuesday, June 1, 2010
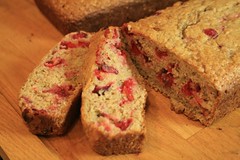
Cranberry Banana Flax Seed Bread
Right, so per usual, I shouldn't be blogging. I shouldn't even THINK about anything but school, graduation, and my upcoming move. More so, school with the plethora of work I have a head of me… 2 presentations, one on histology, one on clonogenic survival (BI2536 bitches!!), a manuscript, a paper, stats exam and my last pharmacology exam ever (I hope). Among other things, social obligations such as salsa dancing, Dim sum, BTN BARCRAWL (June 8th, Wicker Park), Grad College Banquet Dinner and what nots… gosh, my life is so hard!
Anyhow, In two short weeks, so much is happening: I turn 25, I graduate with an MS, Dan, Nan, James & Joey are visiting, my parents are coming, I'm going on a tall ships boat ride, I'm going home to CT for a bit, and then…….
EPIC ROAD TRIP!
Until then, lets talk cranberries. Yep, still have more in the freezer. Crow didn't eat all his bananas, soooo they were frozen and now in this recipe. Banana bread gets boring. Cranberry anything is delicious. Banana Cranberry with some whole wheat flour and Flax seeds, its a fiberous delight.
Cranberry Banana Flax Bread
ingredients
.25 c olive oil
2 eggs
1 c white granulated sugar
1 c AP flour
.5 c whole wheat flour
.25 c flax seeds, unground
1 tsp baking powder
.75 tsp baking soda
.5 tsp cinnamon
.5 tsp salt
1 c frozen cranberries, slightly thawed then chopped
3 frozen bananas, slightly thawed, peeled, then mashed
instructions
PREHEAT OVEN, 350F
1. mix olive oil, 1 egg, and sugar
2. add next egg. mix well
3. add bananas and cranberries, fold in (or let the whip attachment go around 2 or 4 times)
5. in another bowl, add all dry ingredients
6. add dry ingredients in 3 aliquots, making sure to mix fairly decently in-between
7. DO NOT OVER MIX. it will result in a chewy bread. cheeewwwyyy.
6. bake 20-25 minutes in two loaf pans, until cake tester comes out clean.
7. cool on wire rack.
8. Bring to your 8 am presentation meeting and hope it distracts enough to disregard the poor quality histophotos.
Saturday, May 22, 2010
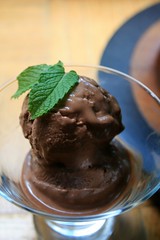
Chocolate Mousse
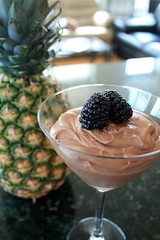
One of my favorite ALL TIME DESSERTS is The Chocolate Mousse. Light, rich, chocolatey goodness. On a recent trip to the international market I came across an entire SECTION devoted to Mexican Sour Cream. What could be so special and unique about this said Mexican Sour Cream to have an entire dairy case devoted to it?
So I bought a small container and went home and tried to use it as dip. UTTER FAILURE. Turns out, Mexican sour cream is hardly like sour cream at all. It's much runnier and has only the slightest big of tang of what you would expect of sour cream. Instead, its more like an ultra thick, ultra rich heavy whipping cream similar to a creme fraiche. Apparently, chefs love this stuff because it holds up for days, rather then collapsing after a few hours, which frequently happens with heavy whipping cream whipped desserts.
I concocted a pretty simple to do Chocolate Mousse using said Mexican Sour Cream. The result: a very light, yet dense mousse. To me, it's almost like a really light ice cream, sans the frozen component. Rich, smooth, its an over all tasty success!
After making this, I would also think that crumbled Oreo Cookies would be a really good addition to it as a topping or layers (remember those chocolate pudding earth cups you got as a kid?)
Chocolate mousse
ingredients
1.33 c mexican sour cream
.5 c heavy whipping cream, divided
2 c semi sweet chocolate chips
3 oz strong coffee or espresso
1 tblspn dark rum
1 tblspn Godiva liquor (optional)
3 tblspn butter
1 tsp granulated gelatin
instructions
1. put your mixing bowl and beaters (or whisk attachment) into the freezer
2. in a double boiler mechanism, bring about 1.5 - 2" of water to just below a simmer
3. in a small heat proof measuring cup, measure out .25c heavy whipping cream. sprinkle on the gelatin into the measuring cup
4. in large, heat proof mixing bowl (that can be comfortable over your pot of just below simmering water), put in the chips, coffee, rum, liquor, and butter
5. with a whisk, mix until just about all the chips have melted, at this point remove from heat and continue on whisking
6. cool by occasional stirring, until just warm to the touch.
7. turn the heat off the double boiler and place your mixing cup (with the gelatin/cream mixture) itself into the water. stir until it is throughly heated, warm to the touch
8. pour the cream/gelatin mixture into chocolate mixture and stir
9. remove bowl and beaters from freezer. put in sour cream and remaining heavy cream. beat until peaks form
10. stir in .25 of the whipped cream mixture into the chocolate mixture. fold in remaining whipped cream in 3rds of what remains (add whipped cream mixture three times)
11. DO NOT OVER MIX OR ELSE YOUR MOUSSE GOES SPLAT! It's okay if there will be white streaks in the chocolate mixture
12. spoon into desired containers: ramekins, martini glasses, one 9x9 baking pan
13. chill for 1 hr, consume with happiness!
makes uh... well, depends on what you use as a container. I ended up pouring into 1 large martini glass and the rest into a 9x9 pan, making a layer of mousse about 1.5" thick.
Friday, May 21, 2010
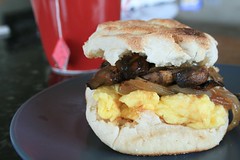
A Breakfast Sandwich with Perfectly Scrambled Eggs
As some of you may or may not know, I have the most insatiable love for breakfast foods. The only exception would be pancakes. I abhor pancakes. One bite and I am so done.
Another fun fact about me, I used to work for a breakfast deli, both as The Coffee Girl (yeah, thats right, I walked around pouring coffee and bussing tables) and then somehow got sucked into being the occasional Kitchen Staff. There, I perfected the art of buttering toast, plating out food, and scrambling eggs (yes, all of the above really IS an art). If you've never heard of Herb's Deli and you're from Southeastern CT, you ought to try it at some point or another. Delightful breakfast food and personally, I really like the corned beef, which Herb makes in house. Tasty.
Lately, I've been loving The Sandwich. Last night, I made a tasty seared open face skirt steak sandwich, where the sauteed mushroom and caramelized onions came from. So this recipe is more about perfecting the art of making the perfect scrambled eggs for your sandwich. Anyone can put together a breakfast sandwich, but what truly makes a good breakfast sandwich is the egg you have as the protein. So I won't tell you how to put your english in the toaster (also, english muffins take a long time to toast, so to get a nice golden toast, put your toaster on high) or how to saute your mushrooms or how to make the onions, but instead focus on the eggs. If you do this right, you really don't need more then one egg per sandwich but since this wouldn't be filling enough for me, I always scramble two.
Perfectly Scrambled Eggs
ingredients
olive oil
2 eggs
1 tblspn milk
1. Prepare your pan. In a heavy, non stick pan turn the heat on high and put in enough olive oil to coat the bottom
2. In a medium bowl, crack two eggs and add the milk. beat the eggs with a fork. I mean, BEAT THE EGGS. beat the eggs until when you lift the mixture with the fork, there isn't this eggy dangling mixture from your fork
3. check your pan, is it hot enough? you can always test by putting a drop of egg on the pan and if it cooks right away, then your pan is ready. turn the heat down to medium high
4. with your Non Dominant Hand, hold your bowl with the egg mixture. In the other, the fork.
5. Pour the mixture into the middle of the pan, and as you pour, with your fork, move in a circular direction
6. the eggs should be instantly cooking and as you move in a circle, it should allow more even cooking. As the eggs cook, I like to lift folds of cooked egg and let liquid egg flow underneath.
7. Just before it seems that everything is cooked all the way, TURN OFF THE HEAT. The residual heat from the pan will cook the eggs the rest of the way.
8. You'll note that you might not have pieces of eggs but instead one huge scrambled egg. You can scramble, scramble it but I always find it easier to eat (in a sandwich) as one piece of scrambled egg.
9. If you did it right, you're volume should be pretty big, and you'll only need half of what is in your pan to fit on the english.
nom nom nom.
Monday, April 26, 2010
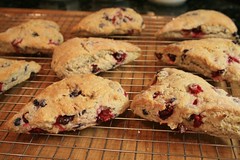
Cranberry Blueberry Scones
Hello Long, Lost, Unlurved & Abandoned Blog!
I have returned after a little spring hiatus. The city has had much to offer me yet so little time to embrace it all! I've spent a lot of time in and around the Midwest, visiting Nan in Indy, visiting the Horses at the famous Keeneland Race Track, enjoying the company of my classmates and truly embracing what is the beautiful City of Chicago.
And once again, I am blogging when I should be studying for my pharmacology exam… Lets do a quick recap of my life though. Leaving off? I don't even recall. Spring Quarter has been the best so far, little structure, lots of labs and having to deal with courses like Stats and "Writing", what ever that means. It's been great. I'm starting to really enjoy Chicago now that it's warming up…
Everyone keeps telling me to hold out for summer, but I don't think I can! I've got bigger, better plans! If you haven't heard the buzz yet, yes, thats right, I'm moving to Colorado!!! With a plethora of biking, hiking, snowboarding, love, and happiness all around, why would I NOT want to move there? Oh, but Lisa, have you found a job yet? Of course not! Sure, I have been trying since February but to no avail. Maybe prospects will be better once I move? But then Lisa, what ever will you do? Easy! Exactly what I have been doing, studying, baking, and just keeping it real and happy and harmonious!
So on that note, whats more happy and harmonious then just starting off your morning with a tasty scone or having afternoon tea and a scone? Absolutely nothing except for a baby walrus (adorable creatures!) Rummaging through my freezer, I discovered a bag of cranberries lurking from Thanksgiving. Not even a touch of freezer burn on them, perf! Low and behold, right next to it, a forgotten bag of blueberries!! Magical, cranberry & blueberry scones!!
The only thing I did different was use vanilla keifer rather then milk or cream. Its a nice low fat alternative plus has probiotic elements (which are all killed off in the 400F oven) but since it is between yoghurt and milk, it adds a nice sweet tang to the scones. Tasty!
Cranberry & Blueberry Scones
ingredients
2c AP
.25 c granulated, white sugar
1.5 tsp b. powder
1/8 tsp salt
6 tblspn unsalted butter, chilled, cubed
1 c frozen cranberries
.25 c frozen blue berries
1 leg egg, beaten
1 tsp vanilla
.66 c vanilla kiefer (or .5c milk/cream)
instructions
1. preheat oven, 400F
2. in your mixer, with paddle attachment, mix first four ingredients
3. mix in butter until a crumbly mixture forms
4. in another bowl, beat together wet ingredients
5. add to dry mixture, mix on medium-low until just incorporated. if it is a bit too wet, add more flour. DO NOT OVER MIX
6. knead 4-5 times (dust with flour) pat out into circle that is 1.5 inches thick
7. cut into 8 wedges
8. place onto cookie sheet, bake 20-25 minutes until golden brown and toothpick comes out clean.
makes 8 wedges. Enjoy with some Earl Grey Tea and happy company
Friday, March 19, 2010
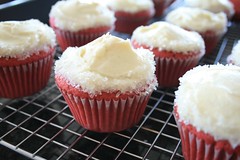
Red Velvet Cupcakes
Ahhh, springtime is wonderful- it marks warmth, sunshine and LOTS OF BIRTHDAYS!
Today is my friend Mimi's birthday. So Red Velvet cake it was. The funny part of red velvet cake though, is that its only red because the massive amount of food coloring in it. This particular recipe, adapted from Paula Deen, doesn't use a lot of cocoa powder, so you can easily make this Purple Velvet (if you were Shena) or Blue Velvet or what ever color velvet you wanted it to be. Really, its nothing more then a glorified vanilla cupcake if you ask me.
But tasty nonetheless. I made pretty much a standard cream cheese frosting, but I also added Madagascar vanilla bean. Adds a slight crunch and a lovely aromatic flavor of vanilla. Yum.
Also fun and optional is a fun sugar crystal rim.
Happy Birthday Mimi!
Red Velvet Cupcakes with Vanilla Bean Cream Cheese
ingredients
2.5 c ap flour
1.5 c granulated white sugar
1 tsp b soda
1 tsp salt
1 tblsp cocoa powder
1.5 c vegetable oil
1 c buttermilk, room temperature
2 large eggs, room temperature
1 tblspn red food coloring (1 bottle) or 1 big scoop of gel food coloring
1 tsp white distilled vinegar
1 tsp vanilla extract
frosting
1 stick butter, RT
1 8oz package cream cheese, RT
.5 tsp vanilla extract
1 tsp milk
2-3 c sifted powder sugar
seeds scrapped out of .5 vanilla bean (optional)
instructions
1. preheat oven to 350F, line cupcake pan with paper lines
2. in your mixer, mix together all wet ingredients for cake
3. while wet ingredients are mixing, sift together all dry ingredients
4. when all wet ingredients are well incorporated, mix in 1/2 of the dry ingredients at a time until all dry ingredients have been mixed in
5. fill cupcake pans 2/3 of the way, bake for 10-15 minutes until cake tester comes out clean.
6. let cool on wire rack
while your cupcakes are baking..... make the frosting!
7. cream together your butter and cream cheese. This should take about 3 or 4 minutes
8. add the vanilla bean, vanilla extract and milk
8. add powdered sugar until you've reached your desired consistency
9. spread over cooled cupcakes
yield = 18 ish cupcakes, with enough frosting for all 18
Wednesday, March 17, 2010
Magical Veggie Pizza
Oh, how I have been craving a perfect slice of NY cheese pizza the size of my head. Unfortunately, once you head west and end up in Chicago, well you get something called "deep dish", which to me is more like pizza casserole and indigestion.
Anyhow, I'm headed off to spring break in mere days and have to consume what ever produce I have left, ASAP so I've been making veggie everything. Okay- so I've only tried to make pizza once before, a long long time ago and I remember it coming out distinctly terrible. Besides, with this business of studying, I really don't have time to make/roll out the dough nor do I own a pizza stone. SHORT CUT: BUY A FROZEN CHEESE PIZZA!!! So for $3.99 at Trader Joe's I bought myself a frozen pizza. But how to piazza it up?? Simple additions of some veggies here and there and voila, 8 dollars later, you've got yourself a pretty much organic veggie pizza of magical proportions. I'd say it straddles the line of homemade if you ask me!
I roasted the pepper (instructions to follow), sauteed the spinach in lots of garlic, sliced up a tomato and and mushrooms, followed baking instructions plus 5 minutes and voila, 20 minutes later, pizzzzaaa!!!
If you are like me and pretty much cook for yourself or don't have a well stocked fridge, I'd raid either the salad bar or loose veggies section to get your veggies to sprinkle on top.
Magical Veggie Pizza
ingredients
1 frozen pizza
1 on the vine ripe tomato (sliced, quartered or halved)
3 crimini mushrooms, sliced
1 bell pepper (i used a yellow one)
2 cups of spinach
1 tsp garlic, minced
1 tblspn olive oil
salt and pepper
instructions
1. Roast your bell pepper. You must have a gas stove, or else I don't really know what else to tell you except google "electric stove, roasting bell peppers". Place your bell pepper on the stove, heat high. Let each side char and rotate until all sides are charred. It should look something like this.
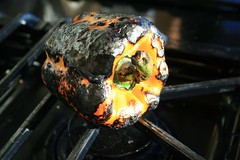
Also, use metal tongs. You don't want to melt your plastic ones.
2. Place your piping hot pepper into a small bowl and place a dish towel over it to let it steam itself. This will help make removing the skin easier.
3. While the pepper is cooling, saute your spinach and garlic together in some olive oil.
4. Once the pepper has cooled enough to handle (5-10 minutes), you should be able to easily rub off the skin. If you can't well, then you didn't char it enough now did you? Don't worry about not being able to remove all the charred bits. As tempting as it might be, DO NOT RUN THE PEPPER UNDER THE SINK. You'll wash away the flavor.
4. Once its nicely peeled, jullianne the pepper.
5. Preheat your oven to 425F (or what ever the pizza box calls for)
6. While your oven preheats, decorate your pizza with your veggie ingredients
7. Bake as instructed, plus 5-10 minutes depending on your pizza size.
8. Let cool, then cut and serve! Remember, hot cheese is taste bud searing cheese.
Serves as many people as the pizza size you bought.

Anyhow, I'm headed off to spring break in mere days and have to consume what ever produce I have left, ASAP so I've been making veggie everything. Okay- so I've only tried to make pizza once before, a long long time ago and I remember it coming out distinctly terrible. Besides, with this business of studying, I really don't have time to make/roll out the dough nor do I own a pizza stone. SHORT CUT: BUY A FROZEN CHEESE PIZZA!!! So for $3.99 at Trader Joe's I bought myself a frozen pizza. But how to piazza it up?? Simple additions of some veggies here and there and voila, 8 dollars later, you've got yourself a pretty much organic veggie pizza of magical proportions. I'd say it straddles the line of homemade if you ask me!
I roasted the pepper (instructions to follow), sauteed the spinach in lots of garlic, sliced up a tomato and and mushrooms, followed baking instructions plus 5 minutes and voila, 20 minutes later, pizzzzaaa!!!
If you are like me and pretty much cook for yourself or don't have a well stocked fridge, I'd raid either the salad bar or loose veggies section to get your veggies to sprinkle on top.
Magical Veggie Pizza
ingredients
1 frozen pizza
1 on the vine ripe tomato (sliced, quartered or halved)
3 crimini mushrooms, sliced
1 bell pepper (i used a yellow one)
2 cups of spinach
1 tsp garlic, minced
1 tblspn olive oil
salt and pepper
instructions
1. Roast your bell pepper. You must have a gas stove, or else I don't really know what else to tell you except google "electric stove, roasting bell peppers". Place your bell pepper on the stove, heat high. Let each side char and rotate until all sides are charred. It should look something like this.
Also, use metal tongs. You don't want to melt your plastic ones.
2. Place your piping hot pepper into a small bowl and place a dish towel over it to let it steam itself. This will help make removing the skin easier.
3. While the pepper is cooling, saute your spinach and garlic together in some olive oil.
4. Once the pepper has cooled enough to handle (5-10 minutes), you should be able to easily rub off the skin. If you can't well, then you didn't char it enough now did you? Don't worry about not being able to remove all the charred bits. As tempting as it might be, DO NOT RUN THE PEPPER UNDER THE SINK. You'll wash away the flavor.
4. Once its nicely peeled, jullianne the pepper.
5. Preheat your oven to 425F (or what ever the pizza box calls for)
6. While your oven preheats, decorate your pizza with your veggie ingredients
7. Bake as instructed, plus 5-10 minutes depending on your pizza size.
8. Let cool, then cut and serve! Remember, hot cheese is taste bud searing cheese.
Serves as many people as the pizza size you bought.
Monday, March 8, 2010
Spinach Pasta Noodles with Wilted Spinach, Garlic and Cubed Chicken
Ahhh, the core GCC coursework is done, done and done! Congrats to all my fellow 1st years at Rush!! So what’s a girl to do with all this so called spare time? Okay, maybe not really because I still have a couple of papers and 3 exams to study for… but come on now, a little mental breather is well deserved!
I bought a 1 lbs bag of baby spinach this past weekend. If you’ve never seen 1 lb bags of spinach, well it’s A LOT. Eating it raw is the best way, but that’s also a lot of spinach to eat. Why not into some pasta form? Over all, this is a super easy recipe if you just go with the spinach/garlic/chicken part to top off some noodles, but if you really want to go for it, it doesn’t take much time at all for super fresh pasta. Pasta making from start to finish takes me about 1-1 ¼ hrs, resting time included.
Why butterflied chicken breast you may ask? Mainly because it just cooks faster. MUCH faster.
Also- this doesn't really make a "sauce" soooo you might want to have a jar of alfredo on the side.
The last time I made spinach pasta, or attempted to I should say, was in Santa Barbara at my Ladera house. Ah, what a nightmare. I still think that my pasta roller was possibly one of the best kitchen investments I’ve ever made.
Spinach Pasta Noodles with Wilted Spinach, Garlic and Cubed Chicken
ingredients For spinach pasta noodles:
2 cups fresh baby spinach
.25 c water
1 tsp salt
2 eggs
1 tblspn olive oil
2-3 c AP flour
ingredients For Spinach and garlic pasta sauté with cubed chicken
1 cup fresh spinach
2 or 3 cloves of fresh garlic minced
1 tblsn olive oil
2 chicken breasts, butterflied
pecorino romano or parmesan for topping
instructions: Pasta Noodles
1. in a pan, sauté baby spinach in the water and salt until cooked down and tender
2. let cool down, transfer into a blender and mix in egg
3. in your Kitchen Aid mixer bowl, make a well of flour with 2.25 c flour.
4. Pour in spinach/egg mixture into the well, add 1 tblspn olive oil
5. Mix on medium until dough forms
6. If the ball forms but feels sticky, add flour until the dough isn’t sticky anymore
7. Let rest for 15-30 minutes
8. Roll out into desired pasta noodle size (this time I went with a pappardelle)
9. Boil in a large pot of boiling salted water until al dente (2-3 minutes)
Makes about 1 lbs pasta
instructions: Spinach, garlic and Chicken
1. In a large pan, heat olive oil, sear chicken breast until about 2/3 of the way cooked through
2. Remove from pan, let rest 1-2 minutes then cube
3. Return pan to stove, on medium high heat, sauté together cubed chicken and garlic.
4. Once chicken has heated all the way through, toss in spinach and sauté until wilted
5. Put sauté mixture on top of noodles, or alternatively toss into noodles.
6. Top of with cheese
Makes enough for 4 servings, ish.
Sunday, March 7, 2010
Cornbread in a Cast Iron Skillet
In tune with yesterday’s recipe, Lamb Chili, what is consuming chili without cornbread? During the Grad College Ski trip a few weeks ago, Kwang O. made an amazing cast iron skillet cornbread. It was sweet and had the whole kernels of corn incorporated into it. It just made it a great way to start off breakfast and a great snack to scarf after an afternoon of snowboarding & skiing. And of course, anything cooked in a cast iron skillet is generally pretty tasty.
The versatility of my cast iron skillet continues from stove top to oven! Why not just use a regular baking pan? Of course, sure, you can use a regular baking pan. After all, not everyone has a cast iron skillet. The idea of using your cast iron skillet is by baking the bread in a preheated pan, you’ll get that nice, crisp golden brown crust that most of us are accustomed to when it comes to having cornbread. When you pour the batter into that preheated pan, its going to make the most beautiful sizzling and bubbling noise.
The corn kernels add a nice element of surprise as you bite into the bread… a little pop of moisture and surge of sweetness (depending on the type of corn kernels you bought). Definitely to be enjoyed with Lamb Chili.
If you aren’t going to use the cast iron, you can just use a regular 9” round cake pan, just omit the "preheat your pan" step, but do remember to grease it, unless you are using nonstick.
Cornbread in a Cast Iron Skillet
ingredients
1 c cornmeal
1 c milk
1 tblspn fresh lemon juice
NOTE: If you happen to have some buttermilk laying around, use that instead of the milk+ lemon juice)
1 tblspn vegetable oil or bacon fat (for greasing)
1 stick butter
.66 c white sugar
2 eggs
1 c AP flour, unsifted
.5 tsp salt
.5 tsp baking soda
1 c corn kernels (frozen or drained from a can)
instructions
1. Mix together milk and lemon juice, let stand for 5 minutes.
2. Pour on to corn meal, mix and let soak as you prepare the rest of the recipe
3. Preheat oven to 375F, grease a 8” or 9” cast iron skillet with vegetable oil or bacon fat (I used bacon fat)
4. Place the cast iron skillet into the oven to let it heat up
5. On the stove, melt the stick of butter on medium heat.
6. While the butter is melting, in another bowl mix together the flour, salt and baking soda.
7. Remove from heat and beat in sugar and eggs.
8. Mix in the cornmeal/milk mixture and the rest of the dry ingredients
9. Mix in the corn kernels
10. Remove cast iron skillet from the oven and pour mixture into the pan. Be careful! Cast iron pan = hot!
11. Bake at 375F for 40-55 minutes, until cake tester comes out clean.
Makes 6 nice sized wedges.
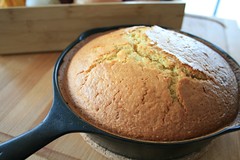
Saturday, March 6, 2010
Lamb Chili
Chili... it's one of those strange comfort foods. One that I kind of really, really love. I've been craving it for some time now, especially when it's been cold out. Travis and Jen brought some turkey chili in the other day and it was soooo good!
On this weekends market adventure, ground lamb was on sale, so I picked some up and was thinking: what could I possibly do with all of this lamb? Put some in my wonton mixture and the rest...uhh.. duh! of course! MAKE CHILI.
So, this recipe I am about to post will fix my craving with gluttonous proportions (it makes at least 3 quarts of chili... or so it seems) that I am going to be eating this for what seems like the rest of the quarter.
A few things to note, I've been crazy for making Indian foods lately and at the international market bought BAGS of cumin, coriander, red chili powder, tumeric and garama marsala that are straight out of the motherlan India. Be aware of the red chili powder heat index and adjust accordingly. In the Whole Foods bulk spices section, they will tell you the heat index. The bag that I bought from the international market doesn't state the heat index but.... it is hotter then any other normal red chili powder. So. Be warned, this recipe is HOT.
Lamb Chili
ingredients
1-1.5 lbs ground lamb
1 tblspn oo
1 bell peppers (1 orange, 1 green), chopped
2 Serrano peppers, chopped
1 large yellow onion, chopped
2 tblspn minced garlic, divided
1.5- 2 tblspn cumin
1.5- 2 tblspn red chili powder
1 tblspn coriander
2 tsp red chili flakes
2 tblspn dark brown sugar
1.5 tblspn Worchester Sauce
1 cup chicken broth
1 15 oz can black beans
1 15 oz can white or red kidney beans
1 28 oz can of crushed tomato
Salt & Pepper to taste
1 tblspn bacon fat, optional
instructions
1. In a large, deep pan, heat the oil and brown the lamb with 1 tblspn garlic, lightly salt and pepper, until the lamb is about 2/3rds cooked through. Remove from pan. Also, try not to over stir the lamb while it browns to avoid getting little crumbles
2. Drain the fat back into the pan and reheat. Toss in onions, peppers, remaining garlic and sauté on medium high heat until brown. Lightly salt and pepper. Here is where you can add the optional bacon fat to sauté the vegetables in.
3. Add in spices, sugar, Worchester sauce, coating the vegetables well.
4. Return ground lamb into the pan, evenly distributing the lamb throughout the pan
5. Add in chicken broth, beans, and tomato sauce.
6. Simmer for 10-15 min, splatter shield on.
7. Taste the mixture and adjust spices, add salt and pepper as needed.
Makes about 2.5-3 quarts.
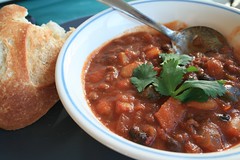
Friday, February 26, 2010
Banana Chocolate Chip Almond Bread
I swear I haven't been ignoring my blog. Winter quarter has been taking its toll on all that is involved in BTN. Long class days and short hours of sunlight, we are all just ticking off the days left before it is spring break.
Being so busy I haven't really been able to blog it up, although I have been making magic in my kitchen, profiteroles, chicken caccatoire, paneer curries. Current obsession is making indian curry everything. Of course, this blog has nothing to do with Indian anything though.
It appears to be the trend that with being in school soooo much I always have left over fruit (mainly bananas) that turn browner then brown before I get a chance to consume. So what is the best thing to do to over ripe bananas? Banana bread of course!!
Another inspiration for baking bread was last week's adventure to Galena IL with the grad college for a ski trip. The skiing itself, was well... we are in the midwest enough said, the rest of the trip, very good time. Kwang Oh made an amazing sweet cornbread that I ate wayyy too much of and long story short instead of concocting banana cupcakes, I went with banana bread.
So you'll notice that there are NO spices in this recipe what so ever. Instead there is chocolate chips and almonds. Of course, I did want to add about 2 tsp of cinnamon, but somehow ran out!!! (how is that possible I do not know) so, up to you if you want to add nutmeg, cinnamon, or ground clove. I am confident that a little addition of any of those three spices will only add to the deliciousness of this bread.
Also note that I used 2 frozen bananas and 1 overly ripe one. To compensate for the extra moisture provided via frozen bananas, I added more flour. You can adjust as needed depending on your banana moisture content.
This bread, the outside is almost burnt like, crisp even but softens up as the days go by. It is sooo good, subtly sweet and with nice texture from the large amounts of almond slices and chocolate chips, this is borderline cake bread. Consume with your morning cup of coffee or tea, or maybe as an afternoon class when GCC 504 is really dragging on.
Banana Chocolate Chip Almond Bread
ingredients
2 lrg eggs
.5 c light baking olive oil (or any other veg oil)
1 c white sugar
3 bananas, thawed and mashed
1.66 c AP flour
1 tsp b soda
.25 tsp b powder
pinch of salt
1 c almond slices
1 c chocolate chips
.25 tsp vanilla extract
instructions
1. preheat oven to 350F
2. in your mixer, mix wet ingredients together (except for vanilla)
3. while wet ingredients are incorporating, in a separate bowl, mix dry ingredients (except for almonds and chocolate chips), if you are adding any spices, add now
4. when wet ingredients are well mixed, add dry ingredients and mix well.
5. fold in chocolate chips and almond slices
6. in two 8 x 9 baking dishes, pour in batter mixture
7. bake for 45-60 minutes until cake tester comes out clean.
consume warm, with butter. Freeze other loaf for consumption at another time.
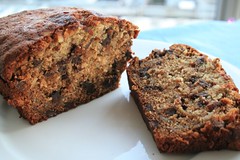
Monday, January 25, 2010
From Scratch Lasagna
I have two amazing little twin cousins, Cindy&Nancy. Okay, they aren't little as in spunky 8 year old twins, they are actually the ripe age of 25 and going strong at a whole 4'& 10".
I love these two girls as if they are my own sisters. They are the funniest little things because they refuse to put anything green into their Pho (ie the cilantro, the thin sliced onions or the scallions) nor do they eat ground beef (or any ground meats in general). Nan also doesn't eat any vegetables. Apparently, Cindy’s gotten better and since the last time I saw her- has become practically a vegetarian.
So what the heck am I supposed to make? In bulk, making lasagna is the easiest thing ever and I make lasagnas all the time. This was a special occasion though- seeing the Tiny Twins. Of course I am also putting off massive piles of school work as I consciously make the decision to do this: Make a whole lasagna from scratch.
That’s right everyone, I made the ricotta, the mozzarella, the sauce and the pasta noodles. All components are super easy to make. It’s just the sacrifice of time really. Both cheeses (see ricotta cheese entry) take less then 4 ingredients each to make, and can really be done in less then 1 hr. The sauce, once everything is in the pot (mine was just a basic peppers, onions, garlic and tomato), just needs time to simmer and the dough, once formed (whole wheat of course!), just needs to rest and be rolled out.
I would have loved to put layers of vegetables- zucchini, yellow squash, egg plant, etc etc and incorporated some kind of protein (meat sauce or Italian sausage?) but over all, it was possibly one of the tastiest lasagnas and biggest labors of food love I have thus far done in my cooking career.
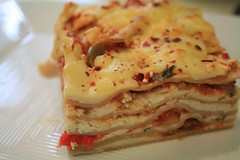
Sunday, January 24, 2010
Orange Carrot Cake
It's the season of citrus! Oranges and the like are coming into full seasonal swing it seems like. I went to Trader's early last week and picked up a 4 lb bag of organic navel oranges. I ate half the bag in like two days. Then on Thursday afternoon, I went over to the Dominics, and there were even more organic navel oranges on sale! I couldn't resist getting another bag.
Then at Whole foods, they had bags of organic carrots on sale. Sure! why not? I like carrots, they are great to snack on.
So with a plethora of oranges and carrots, whats a girl to do with it all??? I woke up Saturday morning, and it was like waking up with the best epiphany ever- duh! Orange Carrot Cake!! I also thought I would be miss fancy pants and infuse in some fresh ginger (does anyone know where my ground ginger went? I have no idea where I put it. It must have gone missing around the time of the gingerbread peoples) into the cake, but there wasn't enough of a kapow! of the ginger for the favor to be noticeable. In this recipe, if you want the ginger zing, you can easily at .33 tsp of ground ginger in there.
The frosting is a basic cream cheese frosting. Yes, I did try infusing a super saturated simple syrup solution with ginger and orange peels. The flavor was in the sugar but did not translate into the frosting. Sad! I did though manage to jazz up the frosting with about 3 tsp of orange zest.
It was a hit with my twin cousins, Cin&Nan. They pretty much ate the whole thing in a day. I think it might fall in more of a "bread" category, quite possibly due to me over mixing and especially when being consumed cold. Not too sweet, a little bit dense, and just a slight citrus flavor, I'd say it's pretty good.
NOTE: I zested the orange, and then squeeze out the juice to be used in the cake.
Orange Carrot Cake
ingredients
1 c butter (2 sticks), softened
2 c sugar
1 tsp cinnamon
.5 tsp nutmeg
.33 tsp ground ginger (optional)
1 tblsp orange zest (about 1 orange)
4 eggs
2 c grated carrots (about 3 carrots)
1 c walnuts, chopped
3 c flour
1.75 tsp b powder
1.25 tsp b soda
.5 tsp salt
.33 c orange juice
instructions
1.preheat oven to 350F, prepare three 9" round cake pans. Line with wax paper.
2. cream together butter and sugar
3. add in the spices and orange zest and mix thoroughly.
4. mix in 1 egg at a time, mixing the egg in well each time
5. mix in the carrots and walnuts
6. in a separate bowl, sift together flour, baking powder, baking soda, and salt
7. in three portions, add flour and OJ, alternating between flour and OJ, ending in flour. Mix well between additions.
8. divide into pans and bake for 30-45 min, until the cake tester comes out clean
Orange Zest Cream Cheese Frosting
ingredients
1 package cream cheese, @RT
2-3 c sifted powdered sugar
3 tsp orange zest
2-3 tblspn milk or yogurt
instructions
1. cream the cream cheese
2. in small portions, add in powdered sugar (I do about .25 c at a time)
3. cream together about 1.75 c powdered sugar and cheese
4. add dairy
5. add more powdered sugar until desired frosting consistency is reached
6. fold in orange zest
7. spread over orange carrot cake
yum!!!
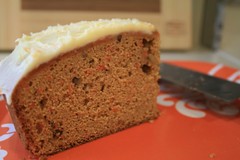
Friday, January 22, 2010
Homemade Ricotta
Over the holiday break, my wonderful friend Andrea gave me the book "Animal, Vegetable, Miracle" by Barbara Kingsolver. I'm not going to lie, I'm a reader of Barbara Kingsolver. I've read "The Bean Trees" & "The Poisonwood Bible" and enjoyed both works immensely. Of course, those were fiction too, and what woman doesn't love reading a good fiction book?
"Animal, Vegetable, Miracle" is actually a nonfiction work, written in conjunction with her husband and daughter about transitioning from an urban life in Tuscon, AZ to Appalachia and farming to feed themselves for an entire year. It's a book that talks a lot about nutrition, the growing cycle throughout their one year, all the crap that goes into your everyday conventional food (Genetically Modified foods anyone?), and the carbon footprint you leave when you eat those raspberries in the middle of winter.
Reading it, along with just being/wanting to be more health and environmentally conscious, really wants me to just grow my own garden and have my own cow. Of course, living on the 16th floor of a high rise in the windiest city on earth.... not so conducive to gardening. I've also managed to go, for the most part, refined sugar free! It is so difficult, but I have to say, I'm feeling pretty good about it. I've pretty much eliminated it, but some days, I can't resist having a little bit of cake or chocolate.
OK- so why the ricotta? I'm currently in preparations for making an entirely from scratch lasagna. Ricotta, Mozzarella, sauce, pasta noodle, all made by me. In "Animal, Vegetable, Miracle", Camille had a great 30 min mozzarella recipe, which I made once. First attempt = success, Second = fail. Ricotta, oh! what an amazing cheese. So inexpensive to make, and soo easy! I read various techniques and found a great recipe via Simply Recipes and changed it very slightly in directions to make a seemingly perfect ricotta for my lasagna.
The interesting part about all of this, is 1 gallon of whole milk was a mere $1.99 and the most expensive was the 1 quart of whole milk plain yogurt, which was $2.99. Yikes. Next time, I'll most likely go with the organic (across the board: whole foods, conventional grocery, Trader Joe's, it seems to be about $5.99 for a gallon of organic whole). But for trial and error purposes, and on the graduate student budget, $1.99 seems to be the way to do it.
NOTE: THIS IS VERY IMPORTANT when purchasing milk, purchase whole, pasteurized milk. NOT ultra pasteurized Ultra pasteurization is a process that allows milk to last longer so that it can be transported further. This process also breaks down the milk proteins much more such that it can never be reconstituted into any other dairy form. So, if you go for the organic, and don't pay attention to the pasteurization process, and end up with the ultra, then you can expect cheese= FAIL.
And for my photo set up, well I haven't made the lasagna yet, so I just had the cheese pose it up. Surprisingly, it was quite delish on naval orange slices with slivers of fresh basil.
Ricotta Cheese
ingredients
1 gallon, whole pasteurized milk
2 cups whole fat, plain yogurt
4 tsp white vinegar
2 tsp salt
instructions
1. in a heavy large pot, pour in milk and yogurt. mix well
2. set over medium low heat
3. in a small bowl, mix together the vinegar and salt
4. slowly stir in vinegar and salt mixture
5. let the solution slowly heat up to a boil. refrain from stirring all the time, but you can stir... just sparingly. It's really important to do this step slowly. Sure, it might take 20 or so minutes, but the outcome is worth the wait!!!
6. while the mixture is heating up, line a colander with cheese cloth
7. when the mixture reaches about 180F (it should be just about steaming), pay very close attention. As it comes to a rolling boil, curds should become visible. Let boil for about 2 minutes.
8. Take off heat and ladle out curds into cheese cloth.
9. Let drain to desired moisture content.
10. Enjoy in lasagna (like me), or make yourself some cannolis, or spread it over, warm over some fresh fruit. Yum!
makes about 4 cups
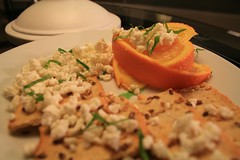
Tuesday, January 12, 2010
Beet & Sunchoke Salad with Balsamic Pomegranate Vinagrette
I’ve got a current obsession: Beets, Pomegranates & Sunchokes. All three are super tasty and yummy. As we all know, the darker the veggie or fruit, the higher the nutritional value. Beets and poms are well known to be super foods, high in vitamins and antioxidant power.
Fun fact about pomegranates: all poms have the same number of seeds in them. Okay, I really don’t know how true that is. I read it on the Trader Joe’s Elevator Chalkboard. Sunchokes? Now what are sunchokes. Technically, the are known as one of two things: California Sunchokes OR Jeruselum Artichokes. Now you are thinking, oh! Green! Large and sort of acorn shaped! Wrong!! It’s actually a tubar. The closest thing I can think of that it resembles would be ginger root.
Light tan in color, when peeled, yields a beautiful white flesh. It’s got the texture of a water chestnut, with a slightly nutty and artichoke flavor. Raw or cooked, its delicious with a lot of nutritional value- which I find surprising considering how it is just a white root- the polar opposite of the beet.
So what do I get when I get creative (okay, not really that creative)? A balsamic pomegranate vinaigrette drizzled over a pile of beet slices, juliened carrots, shredded red cabbage, a sprinkle of pomegranate seeds and topped off with sunchoke slices. Of course no salad is truly complete without some kind of cheese right? Currently also obsessed with Cypress Grove Farm , I had topped off the salad stack with shavings of “Midnight Moon”, which is their hard goat cheese. This hard goat cheese has little bits of lactic acid crystallization, which adds an amazing crunch and amazing flavor and texture to the salad.
The mixture of the goat cheese, tangy yet sweet balsamic pom vinagrette and the crunch of all those root vegetables, ohhhh yumm!!! I couldn’t feel any healthier. For photo sake, I sort of plated the salad as a stack but feel free to turn it into a chop salad and toss all together. You can bet that’s how I prepped my lunch salad for tomorrow.
NOTE that for how much I have as “ingredients” is really up to you, how ever much salad you want to make up. Dressing-wise, the recipe I am putting up makes enough for about 2 salads.
ALSO NOTE: If you really don’t have access to a fresh pom, or don’t want to bother with the seeds, you can easily use Pom juice, just using a 3:2 ratio of balsamic to pom juice, rather then the 1:1 because the Pom juice is concentrated.
ingredients
1 small beet, peeled
1 carrot, peeled & sliced into O’s (or jullianed)
1 large California Sunchoke
.33 c shredded red cabbage
.75 c. pomegranate seeds, divided into .5 c & .25 c
3 tblspn balsamic vinegar
3 tblspn olive oil
pinch of salt
pinch of pepper
instructions
1. taking the .5 c of pom seeds, in a small bowl, crush the seeds to get the juice. I found that the seeds put in a small bowl, crushed with the bottom of a pint glass worked best.
2. In a small sauce pan, put in the vinegar and about 3 tablespoons of pom juice and simmer until slightly reduced, let cool.
3. While your balsamic pom is cooling, arrange your veggies how you want.
4. Once the balsamic pom is cooled, emulsify (or whisk together) with the olive oil, salt and pepper.
5. Toss desired amount onto your salad.
6. Sprinkle on the cheese.
7. Yum!
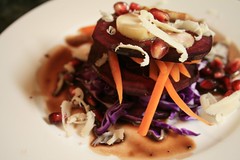
Wednesday, January 6, 2010
Vanilla Coconut Cupcake
Ah, what can I say? I love cupcakes. We all know that.
We had a little pot luck with the graduate council that was themed international. Logic states that I should have made something Vietnamese, but whatever, I like making cupcakes. I haven't had time to concoct red bean, mung bean, whatever bean with coconut cupcakes possibilities, so I did the next best thing: VANILLA COCONUT. YUM.
Jenny made the BEST Glass noodle chicken stir fry something or another. I seriously could NOT stop eating it. oink oink.
This recipe is super simple and isn't composed of anything fancy except for maybe the coconut milk. In a well stocked kitchen, most ingredients I'm sure you'll have handy and if you don't have the coconut milk, you can use regular milk.... you'll just end up with Vanilla Cupcakes.
I'm blogging this mainly because Mimi gave the cupcakes the OK. Its gotta be half decent if Mimi gives the seal of approval right? Feed back seemed especially positive regarding the frosting, which is nothing more then a simple egg white + sugar + cream of tartar frosting. The frosting was almost of a fluff like consistency: sugary, sticky, gooey goodness! If you have ever had royal icing and wish that there was a light and fluffy form of it, well, this would be it!
The cake itself is light-ish, and has a very subtle coconut flavor. It's also super time sensitive. I accidentally stopped paying attention and left them in about 1 or 2 minutes too long and they came out slightly dry, so as soon as that top looks ready and the toothpick comes out clean, take those puppies OUT!
Vanilla Coconut Cupcakes
ingredients
for cake
1 stick (8 tblspn) butter softened
1 c white sugar
3 lrg eggs
2.5c AP flour
1.5 tsp b. powder
.5 tsp b. soda
.5 tsp salt
.5 c coconut milk (or whole milk)
.5 c vegetable oil
1.5 tsp vanilla extract
1 c coconut shavings, optional
instructions
1. preheat oven to 350F, line cupcake pans with paper liners
2. in your mixer, beat together butter and sugar, about 5 minutes, until light and fluffy
3. in a separate bowl, whisk together all dry ingredients
4. in another bowl, mix together all wet ingredients, except for the eggs
4. into the mixer, beat in one egg at a time, beating well after each egg. Don't forget to scrap down the sides between egg addition.
5. in an alternating fashion (and mixing well between additions) add 1/3 dry ingredients, 1/2 wet ingredients, 1/3 dry ingredients, rest of wet ingredients, rest of dry ingredients (starting and ending with dry ingredients).
6. Your batter should be light, fluffy and quite airy at this point. Spoon in to pans until 2/3rds full.
7. Bake 15-18 minutes until slightly golden brown and cake tester (ie toothpick) comes out clean.
8. let cool on wire rack, then proceed to ice with Icing and top off with coconut shavings if desired.
makes about 24 regular sized cupcakes or 12 regular ones and 6 big ones
Vanilla Sugar Icing
ingredients
2 lrg egg whites
1 c white sugar
2 tblspn light corn syrup
2 tblspn water
.25 tsp cream of tartar
1.5 tsp vanilla extract
instructions
1. fill a pot with about 1 inch of water and heat until simmering.
2. in a heat tolerant bowl, whisk together all ingredients. (see end note)
3. place bowl over pot (but don't let it touch the water!) and whisk until the mixture temperature reaches 160F, this will ensure all bacteria have been killed off. Using a hand mixer, beat over the simmering water until you get a nice and fluffy frosting, voila! finished!
NOTE If you are like me, and do not have a hand mixer but instead a stand mixer (I know, that is reverse of how it should be), you can heat up your mixture in your mixer bowl and as long as it reaches the 160F for 15-20 seconds, you can remove from the heat and beat your sugar mixture into frosting that way.
yields about 3.5 cups frosting
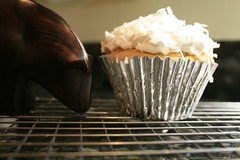
Sunday, January 3, 2010
Wonton Soup II
Per usual, my blogs have been few and far between. I really have no excuse for December's lack of blogging, except for perhaps two week's worth of finals. Psh, I know. Such an excuse for the weak!
So hopefully everyone had a happy and safe holiday with their families and loved ones! I was tucked away in the woods of Preston, CT- enjoying all the comforts of home for a good 12 days. There, I indulged in all the foods that my mom likes to stock pile when my sister and I are home. I had aspirations to do a blog or two when I was home, but the fact that my mom was there, cooking FOR me... well, I just was enjoying being spoiled too much to be bothered to concoct my own recipes.
All in all, I had a great, great time in CT. Of course, all good things must come to an end.... that is for better things! The rest of my winter break was spent in Colorado enjoying high altitude, fresh air, and especially good company. I had my first experience snowboarding in CO and lets just say, when forced to go down runs called "The Moz", uhh, there is a lot of shrieking before many impacts that follow the shriek. But, the upside is, I didn't break anything, no tripping in parking lots, and make it back to Chicago in one piece for the most part.
Okay, so after a quick recap of my life, lets get back to why I am blogging about Wonton soup. I know, I've blogged it before... but this time, there is an actual recipe!! Having a craving for a good meal made with my own hands, I thought I would give the wonton soup a shot. Leaving CO, where 38F feels AWESOME because of the dry desert air, to come back to the city where the temp is 3F WITHOUT the windchill, that just means one thing: SOUP.
I made a chicken/shrimp stock (I will not blog because it came out part disastrous, part really good) as the soup base. But for this blog, I'll only post how to do the filling and wontons. To make a reasonable broth, just heat up some chicken stock and add a splash or two of fish sauce.
Wonton, as my mom makes it, is a combination of shrimp and pork ground together in a food processor. Since I am always cooking for myself, portion control is a HUGE problem. This time intensive soup is not meant to make just one serving. For the pork, I bought a small chunk of pork belly from Whole Foods and about .5 lbs 50-60 cnt head on shrimp, which I then proceeded to devein, peel and behead to toss the shells and shrimp head into the stock pot.
I think the most difficult part will be finding good wonton wrappers (who likes thick wonton wrappers? certainly not I!) and good, fresh wonton noodle. You'll want to hit your local asian grocery for that. Lucky for me, I keep that stuff handy in the freezer. The sauces and spices in the filling should be easily found in the international food aisle, but if you are already at the asian grocery getting your wonton wrappers and noodles, you might want to pick up the fish sauce and oyster sauce there too. Be warned though, Fish sauce only comes in 1 litre bottles.
FISH SAUCE? ewwwwww you might say. But I would take that back if I were you. I bet if you ever ate anything asian, there's most likely at least a splash of fish sauce, if not more. It's sort of the magic sauce that makes everything really tasty.
You'll also note that I did not use any salt in the filling. The fish sauce IS the salt seasoning for the filling, so you won't want to add any additional salt.
I sort of gauged my filling seasoning by smell. Kind of weird, I know. But you sort of just KNOW when it is seasoned just right via smell, plus I am a very scent oriented person so, it works for me. Also, something about taste testing raw pork and shrimp... Trichinosis anyone?
Wonton Dumplings
ingredients
~.5 lbs uncooked shrimp, you can just get already peeled, beheaded ones. or beheaded, deveined and then peel them
~.5 lbs pork belly (also known as pork side), cut into .5inch chunks
1 small shallot, minced
2 garlic cloves, minced
1 tablespoon fish sauce
2 teaspoon oyster sauce
1 teaspoon sesame seed oil
2 teaspoon oil oil
1 teaspoon fresh ground pepper
1 package wonton wrappers
1 egg, cracked into a bowl
instructions
1. into your food processor, grind up the pork 2-3 minutes, then toss in the shrimp. Grind for an additional 1-2 minutes. You'll want to be able to see medium chunks of shrimp
2. put in garlic, shallots, and spices/sauces. Grind for 1-2 minutes. Shrimp chunks should be small.
3. put filling into a bowl, and mix with a spoon until all spices/sauces have bee evenly distributed.
4. Taking your wonton wrapper, wet 1/2 of square, diagonally with the egg.
5. Place about 1 tsp of filling into the center of the wrapper.
6. Fold the wrapper along the diagonal so that the egg wetted half meets the dry half. taking the two further corners of the triangle, pull them together to make the little wonton pocket. pinch together with a little egg wash to stick it together.
7. dunk into a pot of boiling water for 6-8 minutes, until floating.
8. enjoy with wonton noodles in a broth or by themselves dipped in some soy sauce!
makes about 3 dozen wontons
Subscribe to:
Posts (Atom)
