Friday, May 27, 2011

Hello!

Why Hello there blog!  It's been quite some time since I've posted anything (I think just over 6 months?).  The main reason being 1. my mac died, and 2. I finally got a job!

Anyhow, now that I totally scored a new Mac (Apple really knows how to take care of a customer with a busted up 5 year old macbook) so I will be back into my blogging & recipe action.

Where might I be right now?  Currently still in Boulder, CO and working at a biotech company- hooray!  I am running my first 10K on Monday, the BolderBoulder, which has some 50,000 people running it.  When was the last time I even really ran?  Oh, last Sunday, I cranked at 5.5ish miles but before then... probably since last May.  I've gone on a running hiatus since moving to the most athletically extreme town.  But anyhow, the BolderBoulder is going to be insanely awesome!  It is so great to live in a town where I can bike and walk everywhere and eat everything that is delicious (after all Boulder is America's #1 foodiest town!)

Winter was great here with lots of visitors, Dave Crow, Jessica, Shannon, Andrea, & Mike as well as some of Dan's friends.  Total I got 26 days on my snowboard, it was epic!  

Happy Memorial Day weekend everyone!  Off to Colorado Springs for a day at The Broadmoor, Garden of the Gods and visiting with Kyle Smith! 

Saturday, November 6, 2010

Butternut and Acorn Squash Bread

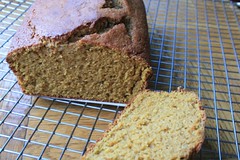
There has been a lot of squash in our lives... maybe too much. From eating plain baked squash, squash seeds toasted in garlic and butter, and Butternut Acorn squash soup, what else could there be left to do with this roasted squash? Well, there was the idea of squash souffle, creme brulee, and cookies, but alas, I settled on just some bread. This is my first loaf that actually came out well with a great consistency and texture. Yay! I am finally learning how to successfully bake at Altitude.


Butternut and Acorn Squash Bread
ingredients
1.33 c butternut & acorn squash puree
2 eggs
.5 c canola oil
.25 c water
1 c white sugar
.5 c light brown sugar
1.75 c AP flour
.5 c corn meal
.5 tsp b soda
.5 tsp b powder
.5 tsp sea salt
1.5 tsp cinnamon
.5 tsp ground nutmeg
.5 tsp ground ginger

instructions
1. preheat oven to 365F, prepare loaf pan with parchment paper
2. mix together puree, eggs, sugars, oil and water
3. in another bowl, mix together the dry ingredients
4. in 3rds, add the dry mix to the wet mixture, mixing until all is incorporated
5. pour mix into prepared pan, bake for 40-55 minutes, or until cake tester comes out clean
6. enjoy with a pat of butter


makes 1 loaf

Friday, November 5, 2010

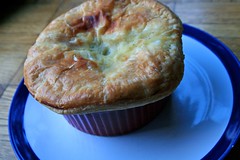
Baked Chicken, 4 ways- Part 4, Chicken Pot Pie


Chicken Pot Pie
Originally uploaded by L.TON
Ah, so here is my last installment of "Baked Chicken, 4 ways". Chicken Pot Pie! This wasn't my best looking pie nor is this really one of my better photos, but its okay... the end result of this dish is deeelliiccciiouuussss!! Creamy, chickeny with a top of puff pastry... it is buttery, fatty, goodness.

My photo doesn't show the great puff factor of the puff pastry, mainly because I made a mistake of putting some in a baking dish, and some on a cookie sheet, which made alllll the difference in the puff factor. The ones on the cookie sheet puffed amazingly, where as the ones in the baking dish did not... so word of advice, put it on a cookie sheet!

I bought puff pastry. To make puff pastry, you need days upon days and a lot of patience. Unfortunately, most puff pastry that you find in conventional groceries have hydrogenated oil (ie tran fats), which makes them cheap but I am not a trans fat eating kind of girl, plus puff pastry should be made with nothing but flour, butter, salt and some ice cold water. So I went to Whole Foods and splurged on a 14 oz package of puff pastry ($10) which was the most expensive component, but totally worth it!

Everything else in the filling is pretty standard, shredded chicken, peas, carrots, onion, celery, chicken broth and whole milk. Finally, the end is near for all of that shredded chicken!

Chicken Pot Pie
ingredients
2.5 tblspn butter
1.5 c shredded chicken
1 medium onion, chopped
2 carrots, chopped
3 stalks celery, sliced
3 cloves garlic, chopped
1/2 cup flour
2.5-3 cup chicken stock
1 cup whole milk
1 cup peas
1 tblspn parsley
s&p to taste
1 package of puff pastry, thawed in advance
1 egg, beaten with 1 tsp water
6 6oz ramekins

instructions
1. Preheat oven to 375F, take your puff pastry out of the fridge and cut out the shape of your ramekin so that the puff pastry is slightly larger then your ramekin, put back into the fridge while you make your filling
2. in a large sauce pan, with medium high heat, melt butter and add onions, celery, carrots and garlic, and a little bit of salt and pepper
3. sautee the mix until onions are translucent, about 10-15 minutes
4. sprinkle flour on, evenly coating the mixture. this will help prevent lumping
5. add 2.5 cups of chicken stock to start and bring to a simmer
6. add milk
7. add chicken, peas and parsley,
8. if the mixture seems too thick, thin out with additional chicken broth.
9. Season with additional salt and pepper as desired
10. ladle in hot filling, until ramekins about 2/3 full
11. put on puff pastry top, pinching the edges to the bowl. cut or punch a hole in the top to allow the pot pie to vent
12. brush on egg wash
13. while you are filling up the other ramekins, put the prepared ones in the fridge
14. once all the ramekins have been prepared, place in oven, on a cookie sheet for 15-25 minutes, until tops have puffed and are golden brown

yum yum yum!

Thursday, November 4, 2010

Baked Chicken, 4 Ways- Parts 2 & 3

So what else can you do with 6 lbs of chicken? Well, hopefully when you ate it (and not all of the chicken), you saved the bones. I should have mentioned, the 6 lbs of chicken meat was meant for only 2 people, and made to stretch of dinner that night, chicken chunks for butternut squash soup and more chicken for Part 4!

Parts 2 and 3 will consist of making chicken stock and then using the baked squash to make a Curried Butternut & Acorn Squash Soup!! For making the stock, in case you are not blessed with owning a fine meshed sieve, a clean dishtowel in a colander will work well for straining your chicken broth out (a great little trick that Chris Lloyd and I learned last year when hosting Thanksgiving!).

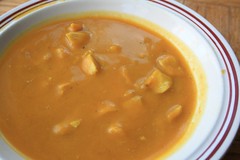
Other exciting news in my life consists of is the Cuisinart Smart Stick. Thanks Crow for the Crate&Barrel gift card :] !! My old Toastmaster worked wonders for a while, but finally got just a bit too tired and broken, so I traded up and got this little guy. Although there is only one speed setting, it is a wonderful kitchen tool, not to mention all the other great little add ons that come with the set! It quickly and evenly purred the soup into nice and smooth squash soup goodness!!

Chicken Stock & Curried Butternut & Acorn Squash Soup
For the Stock
ingredients
1 leek, white parts only
2 celery stalks, cut into 3 inch lengths
2 carrots, cut into 3 inch lengths
1/2 large onion
1 bay leaf
1/4 tsp peppercorns
chicken bones
1-3 pieces of raw chicken pieces (drumsticks, thighs, or wings)

For the Soup
ingredients
1/2 onion, chopped
1 celery stalk, chopped
1 carrot, chopped
2 chopped garlic cloves
2 tablespoons olive oil
3 cups of baked butternut & acorn squash
1 tart apple, peeled and cubed

1.5 cups shredded chicken meat (left over from baked chicken)
3-4 cups of chicken stock*
1-2 tablespoons curry powder
salt & pepper


instructions
For the Stock
1. remove the meat off of your uneaten, remaining chicken legs and set aside.  place everything else (bones from legs, skin peeled off, etc etc)  into a 5-6 quart stock pot
2. fill pot with cold water until all ingredients are covered plus 2 inches
3. put pot on stove, on high, uncovered. as soon as bubbles start to break the surface, turn the heat down so that the pot barely simmers
4. LEAVE UNCOVERED. Skim away surface crud as needed
5. leave on a barely simmer for 3-6 hours, or until all flavor has been leeched out
6. remove all large pieces. Having a clean 3 quart pot ready, strain broth with a fine mesh sieve to get the rest of the crud out
7. plunge pot into a 40F ice bath to cool
8. set aside needed chicken broth volume, and the remainder into the fridge!


instructions
For the Soup
1. in a 3 quart pot, heat olive oil.
2. toss in onions, garlic, celery, and carrots. lightly salt. Cook until onions are translucent, ~ 10 minutes
4. Mix in butternut squash & apple
5. Add about 2.5 - 3 cups of chicken stock, enough to mix into the squash and cover it
6. bring to a near boil, and then let simmer for 20 minutes, or until apples are soft
7. take off heat, and with immersion wand, blend mixture until it is of smooth consistency
8. if it is too thick, add more chicken broth
9. add chicken, and heat up to a low simmer.
10. add curry powder, salt and pepper until desired flavor is reached


* If you have an entire day to make chicken stock followed by the soup, then use your homemade chicken stock, just know since the intial stock is made without salt, you'll have to add more salt. If you are impatient, like me, you can use regular from the can chicken stock

Tuesday, November 2, 2010

Baked Chicken, 4 ways- Part 1

Hello World!  I've been lacking on my blogging... wow! So much has happened since September 17th.. okay, not really...

Happy belated birthday to my friend Christel.  I promised I would do a special blog for her birthday (she did grilled pizzas- they were amazing!!) but the time has waaayyy past!

Anyhow, nothing too new in my life, yes, still very much unemployed!!  The mountains are getting glorious amounts of snow (it's a sight to be seen!) and I am seriously contemplating heading to A Basin for some early season snowboarding tomorrow.   My life is hard.  I know.

This next series of blogs are going to be about chicken quarters.  The chicken quarter, for me personally, is the best part of the chicken, with dark meat, some white and tons of flavor... not to mention it is also super duper inexpensive (Hi Chicken Breasts! What? you cost $7.99/lb?  No thanks, I'll take some of them Chicken Legs instead for $1.99).  Since it is fall and winter squashes are becoming a plenty, I am taking this opportunity to see what I can do with chicken and winter squashes. 


So in this edition of my blog, you can pick and choose what you want to make... but let us follow the life of 6 lbs of chicken legs that I bought.  This blog also won't have a picture (we ate part 1 of the chicken legs last night) but everything else will.    First up is just baked chicken legs.  In the oven with the legs are oven baked potato wedges and acorn and butternut squash.  Sure, it sounds like a lot to have in your oven, but you might as well be green if you are turning it on by cooking as much as possible right?  The legs and potatoes will obviously be eaten tonight and you can obviously have a side of squash too, but the squash will be mainly used for the next evening's dish.


Evening 1, Baked Chicken Quarters, Potato Wedges, and a side of Squash

ingredients

6 lbs of chicken legs, rinsed and pat dry
5 yukon gold potatoes, cut into wedges
Sea salt
pepper
olive oil
1 medium yellow onion, cut into wedges
garlic, coarsely chopped
1/8 tsp red chili flakes

1 butternut squash
2 acorn squash

1 tblspn of flour
1/4 c chicken broth


instructions

1. preheat oven to 375F, coat bottom of baking pan with olive oil
2. season chicken with salt&pepper
3. rub chicken with olive oil
4. place chicken onto baking pan, wedge about 1/2 of the onion in between chicken

5. in a bowl, toss the potatoes in salt&pepper, garlic, and chili flakes.
6. chop up remaining onion and toss that with the potatoes too
7. place in a baking pan

8. cut acorn and butternut squashes in half, remove strings and seeds (save the seeds, they are excellent toasted)
9. in another baking pan, place squash halves cut face up, sprinkle with sea salt, add water so that it is about .5 inches deep and cover with foil

10.  place all three pans (chicken, potatoes and squash) into the oven.  Bake for 45 - 60 min until juices of the chicken run clear and the squash can have a knife move through it easily, potatoes can be periodically tossed (every 15 min) 
11. At this point, if the chicken hasn't thoroughly browned, turn the broiler on to brown the chicken and the potatoes.  Remove squash and let cool. 
12. Remove chicken from pan and let rest. Toss potatoes to let it continue to brown
13. Transfer the drippings from the pan to a sauce pan.  Add small amounts of flour at a time, while whisking continually.  Add a bit of chicken broth, continuing to whisk.  Add a bit more flour until your gravy has reached desired consistency.

14. Consume dinner of baked chicken, potatoes, and if you want, some of the squash (I scooped a bit out and added some butter)

15. Once the squash has cooled, scoop out its innards and toss the shell.  Let everything throughly cool before you store in the fridge.

Tomorrow, we will be making chicken stock, butternut and acorn squash soup!
Friday, September 17, 2010

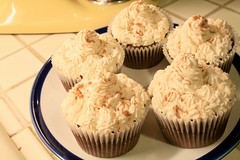
Spicy Ibarra Chocolate Cupcake with Cinnamon Whipped Cream Frosting


Spicy Ibarra Chocolate Cupcake
Originally uploaded by L.TON
I took a small adventure to Aurora, CO. Who knew Aurora housed a beautiful biotech hub and the University of Colorado Medical Center and little Mexico? As I drove around looking for where I needed to go (the Med Center), I drove past a Mexican Grocery store. JACK POT!!! I've been on the hunt for Mexican Chocolate, specifically Ibarra. Mexican chocolate is not like your average Scharffenberger Chocolate bar which you take out of the foil wrap and consume. Instead Mexican chocolate is composed of extremely granular sugar, cacao nibs and cinnamon. Typically it is melted down in milk and made into hot chocolate. Tasty! Looks like Dan and I will be enjoying some extra spice and sugar in our hot chocolates this winter!

Besides Ibarra, what ELSE could make a typical Chocolate Cupcake amazing? Have you ever had a Spicy Chocolate Bar? Oh, who knew the flavor of chili spiciness could be so mutually symbiotic to chocolate... like champagne and oysters, it was meant to be! This flavorful cupcake has a lingering heat from red chili powder, a subtle hint of cinnamon and the crunch of Ibarra.

Ohhh la la!!!


Spicy Ibarra Chocolate Cupcake with Cinnamon Whipped Cream Frosting

ingredients

1 c AP flour
6 tblspn cocoa powder
.33 (.5@SL) tsp b soda
.33 (.5@SL) tsp b powder
.25 tsp salt
.25 tsp red chili powder
.25 tsp cinnamon
1 stick unsalted butter, softened
1 cup (minus 2 tblspn) white sugar
1.5 tsp vanilla
1 egg
.5 c milk*
.33 c heavy cream*
*if @SL, 2/3 cup whole milk would be just fine

4 squares of Ibarra, chopped

instructions

cupcake
1. Preheat your oven to 375 (350@SL), prepare cupcake tin.
2. whipped butter and sugar together until creamed and fluffy
3. add egg until mixed, add vanilla
4. in a separate bowl, mix flour, baking powder, baking soda, salt, chili powder and cinnamon
5. alternating between dry, wet, dry, wet, ending in dry combine flour mixture and milk
6. fold in Ibarra chocolate
7. pour into pan (2/3rd full for standard, 1/2 full for giant sized)
8. bake 20 or so minutes until toothpick comes out clean.
9. let cool on wire rack

makes 6 giant cupcakes

Cinnamon Whipped Cream
ingredients
.5 c heavy whipping cream
3 tblspn powder sugar
.5 tsp vanilla extract
.25 tsp cinnamon

instructions
1. first mix sugar, vanilla & cinnamon
2. slowly add in cream until soft peaks form
3. do not over beat or else you will get butter
4. Top on cooled cupcakes and sprinkle addition cinnamon on top if desired.

Wednesday, September 8, 2010

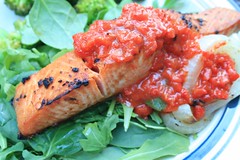
Salmon with Roasted Red Pepper Sauce


Originally uploaded by L.TON
Happy Post Labor Day Weekend! I just wrote and entire blog about how my meal I just ate (see photo) was the least environmentally plate ever. Greens from California, Fish flown from Alaska, Bell Pepper from Canada... oh but the onion, that's from Colorado...

Anyhow, I've been making all sorts of sandwiches and recently, its rekindled my love for the roasted bell pepper. sweet, tangy, and oh so delicious it is such a versitile addition to anything! I had one left over in the fridge from making sandwiches... but hm, an entire roasted pepper on a piece of fish? hmm... how about I food processor that up and dump it over some broiled salmon. Voila!

I chose to eat this on a bed of baby arugula and baby spinach sans dressing with a side of steamed broccoli. You can easily choose to eat it with rice, potatoes or whatever else side you want!


Salmon with Roasted Red Pepper Sauce

ingredients
2 6 oz portions of Salmon (I bought King)
4 slices of sweet onion
1 roasted bell pepper
1 tsp olive oil + some
1 garlic clove, minced
s&p to taste

instructions

1. prepare salmon and onion by rubbing with olive oil, sprinkle with s&p; place on broiling pan

2. rub minced garlic on salmon

3. turn on broiler to low and allow 5 minutes for the broiler to heat up, then broil the fish and onion 5 inches away from heat for 5 minutes

4. while the fish is broiling, coarsely chop the bell pepper and place in a mini food processor. Pulse 4-5 times. add the olive oil and pule 3-4 more times. sprinkle in some salt to taste

5. flip the onion over, turn the broiler on HIGH for 3-4 minutes to brown up the fish and onion

6. Plate your fish, top with roasted red pepper sauce

makes enough sauce for 2 portions